Roman blind workshop with Fromemaid

The Roman blinds for beginners workshop

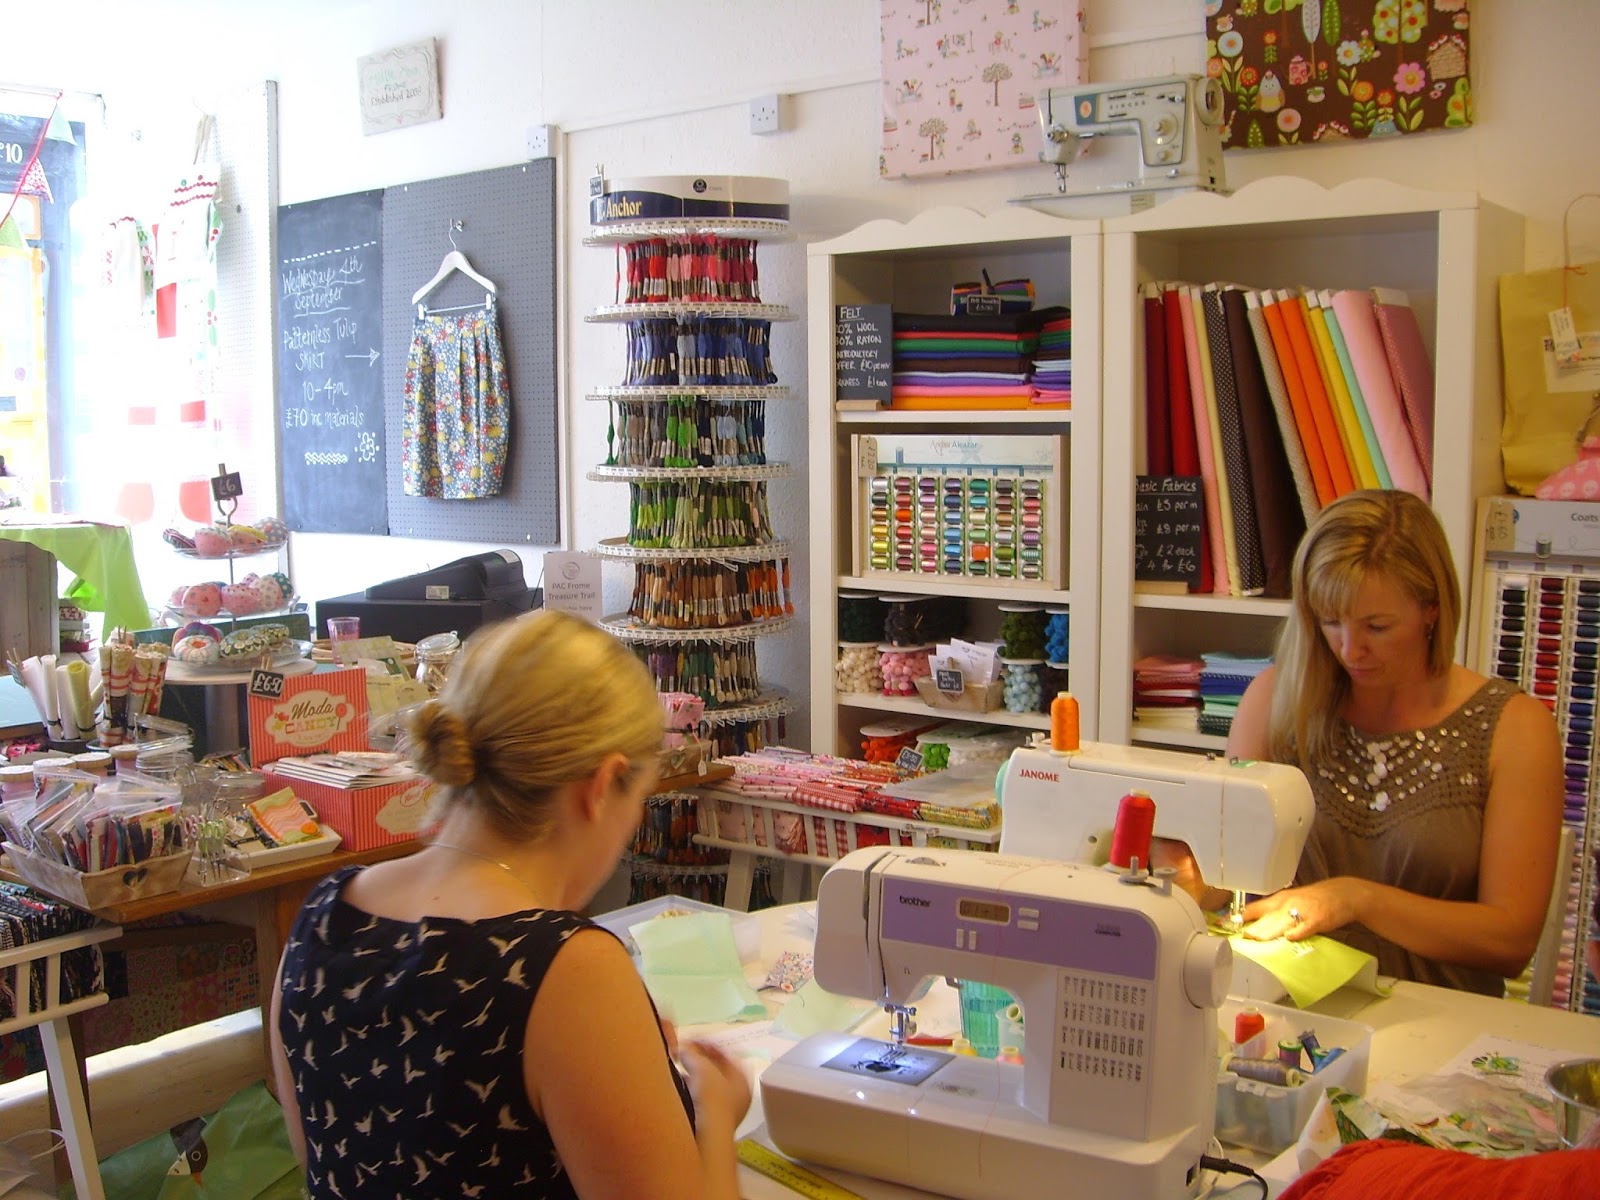
The photographer from the local paper Frome Times came by and Rachel; one half of the sisters team who own the business, invited him to return when the workshop was in full swing.
Whether this was prearranged or spontaneous I do not know!  All four ladies were happy to have their picture taken and I think it will be a lovely momento of my time at Millie Moon when I am older, our copy has gone in our family keepsake box!
    

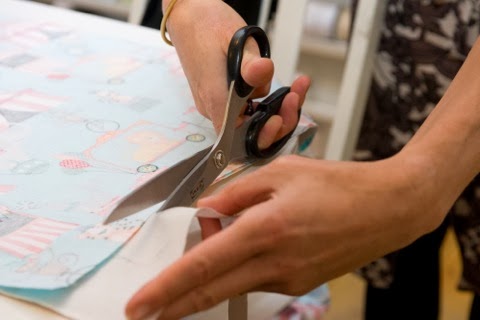
More importantly, each participant successfully completed a sample sized Roman blind and felt equipped with the skills and knowledge to go home and produce their full sized blinds in their homes.

I too was inspired  by the workshop and this seasons trend for “Scandi greys” soft furnishings and bought plenty of my favourite fabric; from the Michael Miller range “Just my Type” by Patty Young, to make blinds and a quilted throw for our bedroom. It feels very much a modern interpretation of Orla Keily to me.

Many thanks to Martyn of the Frome Times for allowing us to reproduce his photographs in this blog post with his kind permission.

By Fromemaid xxx

 
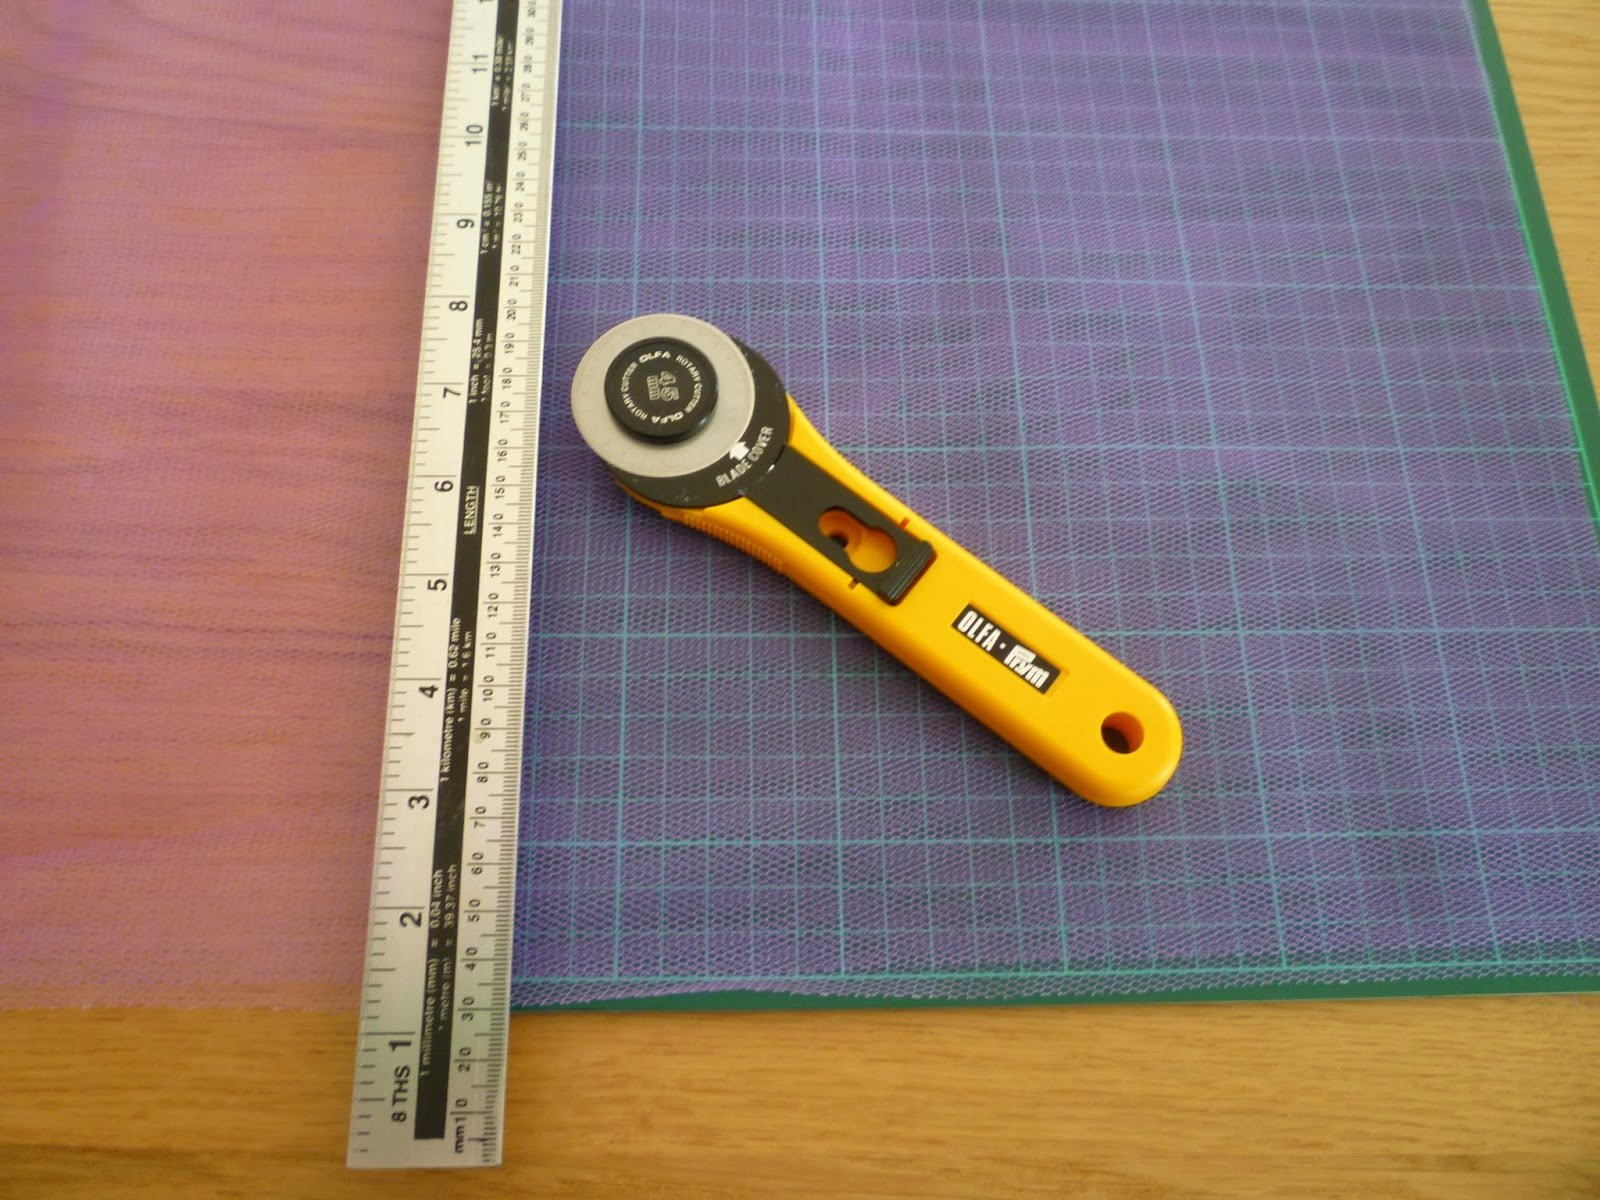
The workshop makes a sample blind approx 
65x35cm to allow you to learn the skills and gain the knowledge to go on and make a full size blind. 

Millie Moon Makes – Free Tutorials – Make a simple net petticoat

This is a free patternless tutorial for a net petticoat with an elasticated waist, perfect to be worn under the new Anna Vickery Sewing Patterns For Children’s Clothing Childs Rock n Roll dress, or Childs Party Dress.
Materials:
15cm cotton fabric (115cm wide)
1m25cm of dress net (150cm wide)
50cm of ½” wide elastic
Matching thread
Sewing machine/iron
Pins/safety pin
Cutting board/metal ruler/tape measure
Scissors/tailors chalk/rotary cutter

Step 1: Cut – With the width of the fabric folded in half, cut a 15cm long strip from the cotton fabric for the waistband and 4 equal lengths of dress net (see table below for net lengths.) A cutting board with metric markings, metal ruler and rotary cutter make this quick and easy, but if you don’t have them this can be done with a ruler, chalk and scissors.
Net Lengths:
Age 1-2 = 24.5cm x4
Age 2-3 = 26cm x4
Age 3-4 = 27cm x4
Age 4-5 = 28cm x4
*If you use these lengths the petticoat will not show under the dress – if you want the hem of the petticoat to show make the net lengths longer*

Step 2: Press folds in waistband – While to waistband is flat press a double fold using an iron of 1cm, then 3cm at the top for the elastic and 1cm, then another 1cm at the bottom for the hem.

Step 3: Back seam – Because the back seam edges of the waistband are the ‘selvedge’ edges of the fabric they do not need finishing (handy!) Open out the pressed folds at the ends of the waistband and join the ends with right sides together, pin and sew using a 2cm seam allowance. Press the back seam open and the folds back in place.

Step 4: Stitch waistband – Machine stitch around the folds on the waistband. Stitch close (3-5mm) to the inside folded edges. Leave a gap in the stitching of 2cm on the top section for the elastic to go through.

Step 5: Attach net – I find it useful to mark the waistband into quarters with pins so I know what space each 150cm long piece of net has to fit into. Machine sew the net straight onto the waistband hem in a single layer, gathering up the net by hand as you go along, the edge of the net should be about 1cm above the hem on the right side and the stitch line should be in the same place as on the hem. When you get to the next waistband quarter/150cm piece of net overlap the net pieces by 5cm so you can’t see the join.

Step 6: Insert elastic in waistband – Attach 1 end of the elastic to a large safety pin and pin the other end to the waistband near the 2cm gap in the stitching. Slide the safety pin into the top fold and pull the elastic through the channel, gathering up the waistband cotton fabric as the elastic works along. Once the safety pin reaches the gap in the stitching again pull it out, adjust the elastic to fit the childs waist measurement, knot the elastic ends together, trim off any excess and sew the gap closed.


Step 7: Decorate – Trim the petticoat with ribbon, lace, ric-rack or bobble trim. You could also add bows or ribbon roses, the petticoat will be so pretty it could be worn on its own with leggings or under a handmade dress made from an Anna Vickery pattern.

Kids Club age 7+

Did you know that “Mollys captivating crafts”, run a Saturday kids club here at Millie Moon.

On the 1st Saturday of every month, Molly takes a group of children age 7+ and teaches them simple sewing techniques such as sewing on a button. These felt projects are completed in the two hour session and each month there is something new to make. Cost is £10 but keep a look out for special offers.

Contact us for more information

01373 464437

info@milliemoonshop.co.uk

Charity Quilt making day

Come and Join us on April 9th between 11-4pm to make as many quilts as possible for the amazing “Project Linus” charity.

Please contact us for more information

01373 464437

Info@milliemoonshop.co.uk

All in all a thumbs-up Freemotion Embroidery class

Hello hello, I’ve been at it again – meeting some lovely ladies whilst teaching them the ways of freemotion embroidery at Millie Moon. For a little while now I’ve taken a break (only a very little one – a smudge of a break) from creating with freemotion embroidery, so it was a lovely change to my day to be passing on the skill to keen sew-ers along with showing off my lovely collection of Anchor Embroidery threads, taking my stork scissors out of hiding and demonstrating the ingenuity of the magic marker pen which I can almost guarantee an’ooh’ and an ‘aaah’. (All tools that can be found in your Millie Moon Shop.)

In the class I introduce you to the tools you will need, show you how to set up your machine and demonstrate a few different exercises to build your confidence and knowledge of freemotion embroidery. You will also aim to finish a picture in the class which you take away with you.

What is freemotion Embroidery?? – I hear you cry. Well in essence (also known as freehand machine embroidery) is a technique on your sewing machine that uses your creativity ability to embellish and decorate by drawing. This is not to say you have to be great at drawing to get the best out of the technique – if you like shape and colour or just sewing you should give it a try.
So anyone can have a try?
If you can already sew and are quite happy and confident with a sewing machine then you can try freemotion embroidery, but I wouldn’t say this technique is for everyone. Its a technique I have learnt over the years that firstly you have to have patience (and lots of it at times) and also to keep experimenting and playing at – the more mistakes you make the more you learn and the more rewarding it becomes. A lot of my mistakes involving freemotion embroidery turn into happy mistakes.
Do I need a special machine?
No, not at all. A household domestic sewing machine would work fine just check that the dog feeds (the zig zag teeth underneath your needle) can be lowered or you have a metal/plastic plate to go over them: to disengage them.

When teaching a class in freemotion embroidery – I do love it when a. the students really enjoy themselves and get excited about the technique and the time just flies away with you and b. you see a definite style appear within the way the student creates and manipulates the technique. Its very rewarding and all in all the class becomes a thumbs-up class. Have a look what some of you creative types have made in pass classes (sorry if your picture is not on here- I’m a bit rubbish at recording things) –


If you fancy a taster at freemotion embroidery keep a look out for beginners Freemotion Embroidery making an appearance in the next batch of workshop.

Hopefully see you soon (perhaps on a freemotion embroidery class),
Angela

There is nothing standard about our lamps :)

Workshop with Fromemaid.

Sunday the 8th of September saw my first whole day of lampshade making in our Frome shop.  We used the  individual lampshade kits now stocked by Millie Moon which make the whole activity that more approachable to beginners-not to mention more affordable, if you only want to make one, or a few for personal use.

Eight lovely women attended the  morning and afternoon workshops and as ever, the range of fabrics chosen varied greatly from person to person. So at the end of each workshop there were four very professional , individual lampshades to wear (!)